- Share
-

-

-

-

-

How to Avoid Common Pitfalls During Integration
When integrating Dynamics 365 with SharePoint, it’s crucial to be aware of common pitfalls that can derail the process. First, ensure that you have a clear understanding of your business requirements and objectives before starting the integration. Inadequate planning can lead to misalignment between systems. Additionally, involve key stakeholders early in the process to gather insights and address potential concerns. Regularly testing the integration during development can help identify issues before they escalate. Finally, provide comprehensive training for users to ensure they are comfortable with the new system, maximizing the benefits of the integration. By taking these proactive steps, you can avoid common challenges and achieve a smooth, successful integration.
Microsoft's out-of-the-box Dynamics Integration
Microsoft has also recognized the need for Dynamics integration. For this reason, you can activate Microsoft's standard SharePoint Dynamics Integration (hereafter also referred to as Standard Integration) in D365 in just a few steps and without much effort.
After you have activated Microsoft's standard integration for your D365 entities, you get an extra view in Dynamics that displays the documents linked to the record.
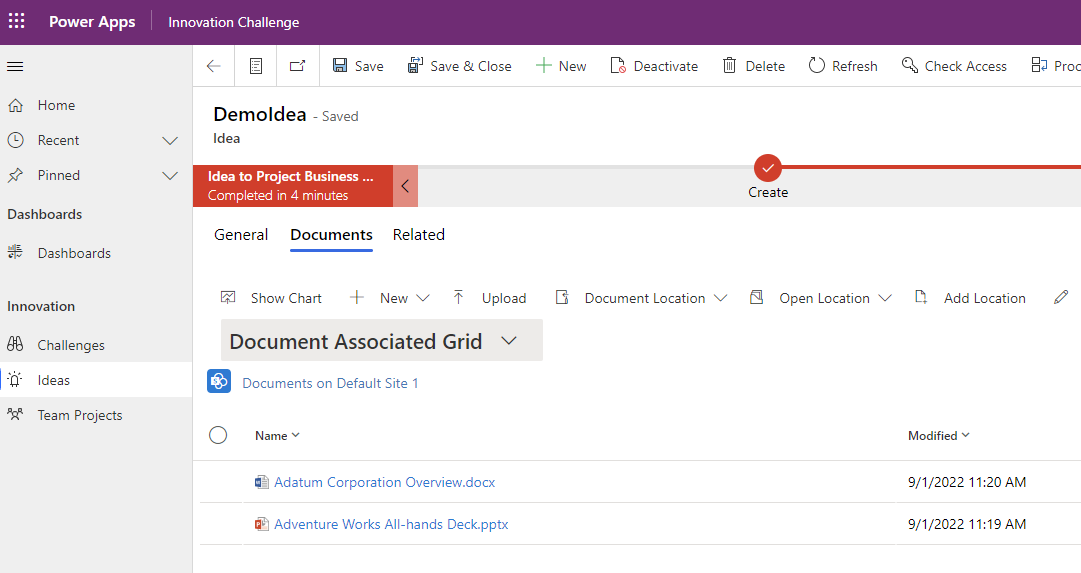
Documents can now be uploaded, opened and edited directly via the Dynamics user interface in the respective SharePoint folder.
- Secure the expert knowledge
- Benefit from checklists
- Use the decision matrix
Successfully connect SharePoint and Dynamics 365 in a seamless, value-added way.

Activating the Standard Integration
Here we want to give you a step-by-step guide on how to activate the SharePoint Standard Integration for your company as a system administrator.
First, go to your D365 interface, click on the gear in the upper right corner and then on "Advanced Settings". Here you will find the item "Document Management".
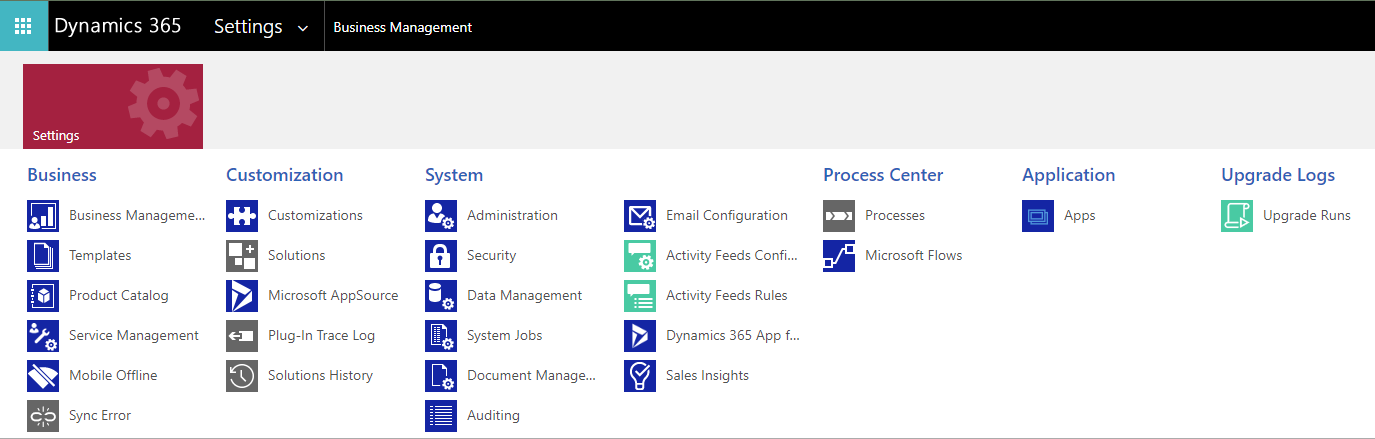
Step 1: Activate the server-side SharePoint integration by going to "Document Management" under "Advanced Settings.
For this we only need the link to a SharePoint site collection on which we want to structure our document storage. Ensure your SharePoint site collection is within the same Microsoft tenant as the Dynamics environment.

After the click, the installation wizard opens and guides us through the activation process.
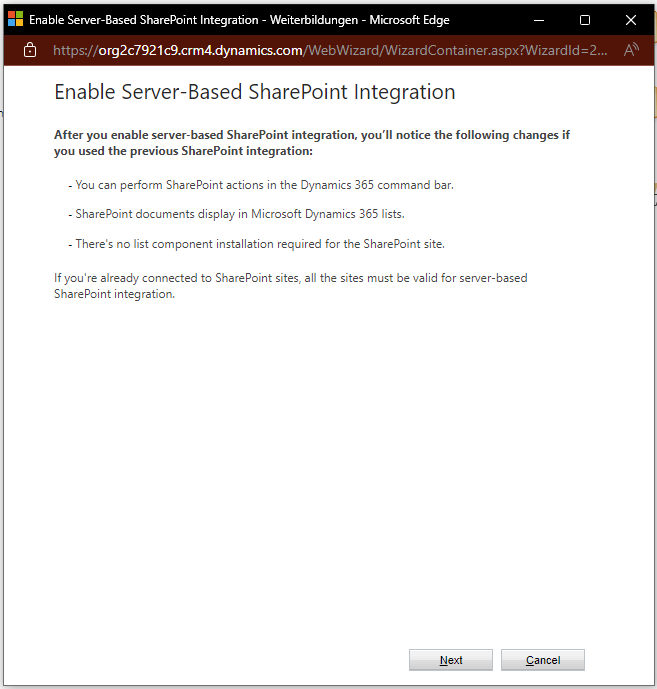
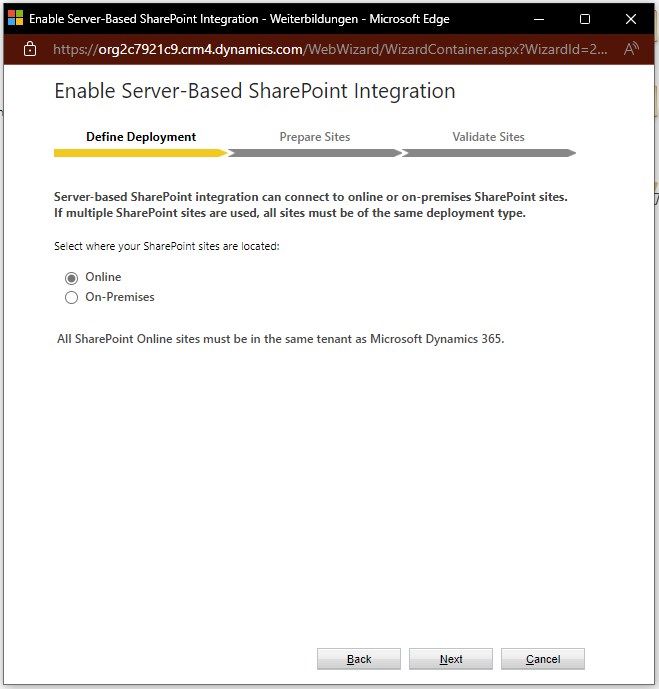
Step 2: We select where our SharePoint site(s) are located. In our example, we use the cloud version of SharePoint, and therefore select "Online".
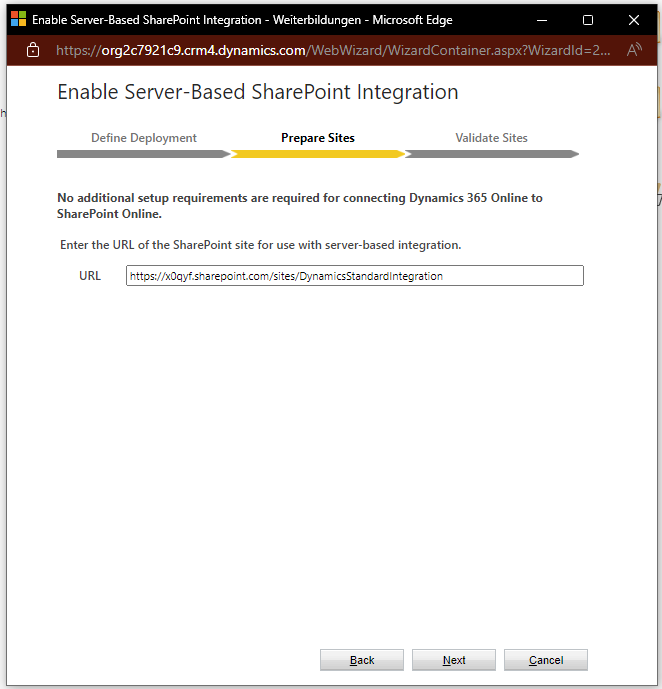
Step 3: Then, in the URL field, we enter the URL to the SharePoint site collection we created earlier.
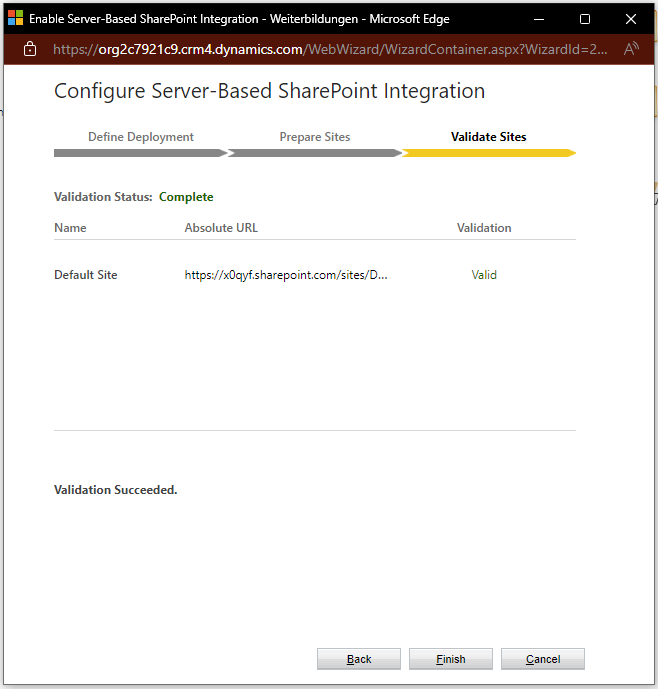
The installation wizard then checks whether the specified site collection really exists. If the validation is successful, you can close the window via "Finish". The server-based SharePoint integration is now activated.
Step 4: Back on the Document Management overview, we select "Document Management Settings" in the top-left corner. Here all our Dynamics 365 entities are listed.
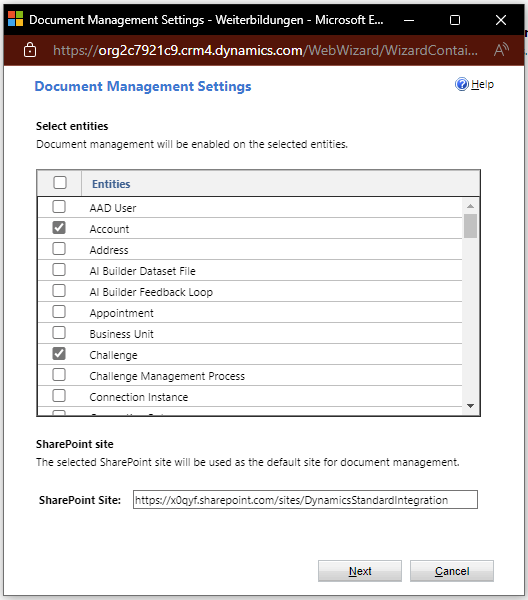
Make sure that some of the system entities are already checked by default. If you do not want to enable standard integration for these entities, uncheck the respective field. At the end of the activation process, the installation wizard will create a separate document library for each hooked entity. At the bottom, we specify the same SharePoint Site Collection that we validated earlier.
Step 5: In the next window we have the possibility to influence the SharePoint folder structure.
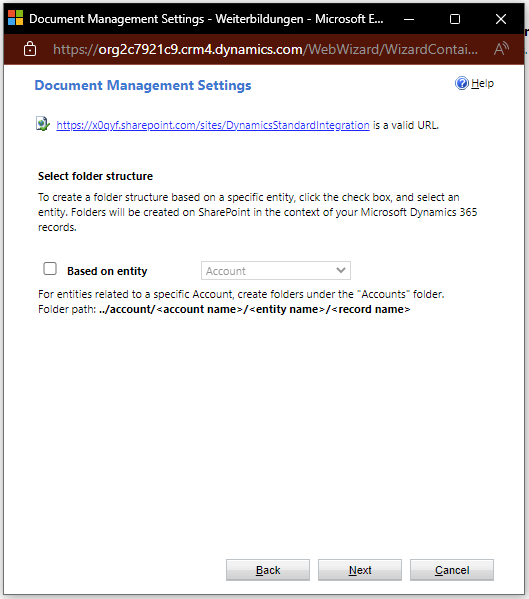
With Out-of-the-box, Dynamics allows us to put a kind of "focus" on a particular entity of our choice. For example, if we select the accounts entity here, then all entities that have a reference to a particular account will be created in a library that is nested in the account's library.
For our demo, the normal standard integration is sufficient, so we just click continue.
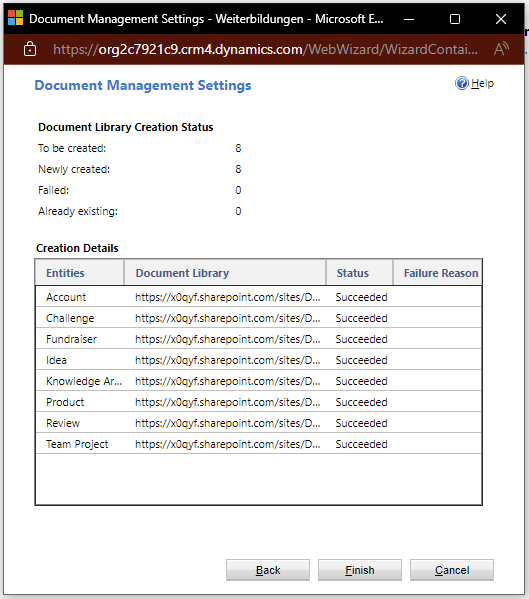
Step 6: In the last step, the wizard creates the desired libraries on our SharePoint site. In the status field of the window, we can see if the creation was successful.
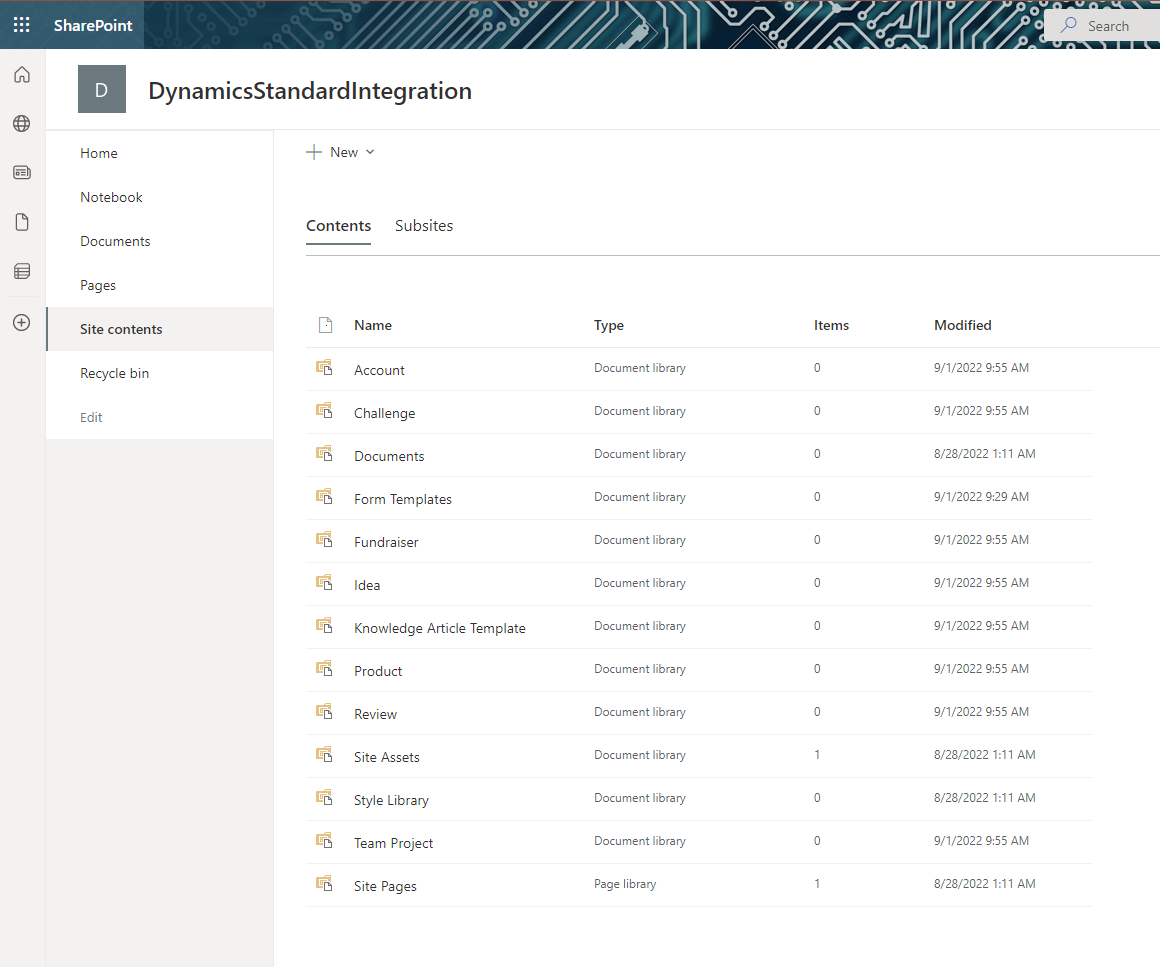
We can check the results, after reloading the page, directly on SharePoint (under "Site Contents"). There you should now find the new libraries.
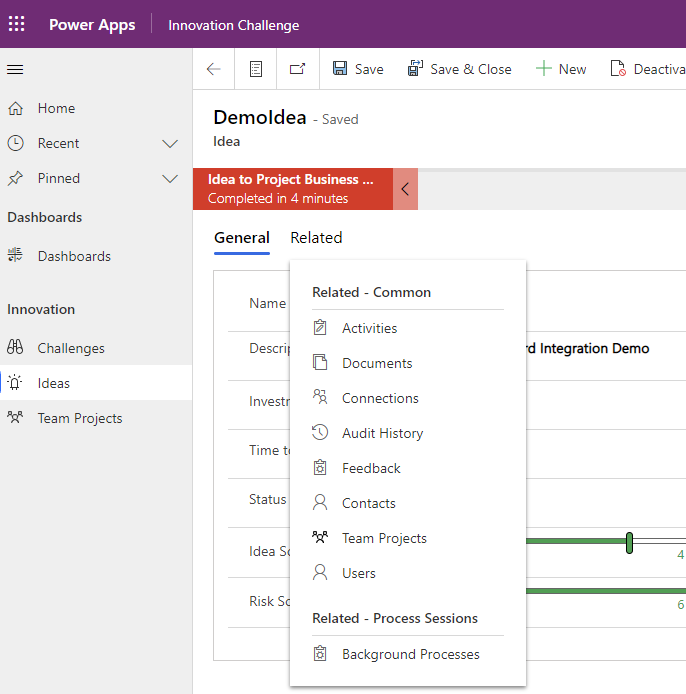
In D365 you should now see the option "Documents" for all entities for which the standard integration has been activated (if necessary, reload the page here as well). Click on it to get to the view of the document grid described at the beginning.

- Secure the expert knowledge
- Benefit from checklists
- Use the decision matrix
Successfully connect SharePoint and Dynamics 365 in a seamless, value-added way.
Activating the Document Management feature was easy. Is everything done with it now?
Unfortunately, not everything is done with the activation of the Document Management feature of Dynamics 365. If you've read our article this far, we're sorry to tell you that there are a few steps you should take even before activating this feature to avoid future problems. If you are planning to integrate Dynamics 365 with SharePoint, you should review the 5 key building blocks of a Dynamics 365 and SharePoint integration solution for your needs.
Steps for integrating Dynamics 365 with SharePoint
- Activate server-side SharePoint integration
- Select the SharePoint Type (Online | On-Premises)
- Select SharePoint type (Online | On-Premises)
- Check document management setting of Dynamics 365 entities
- Select the entities for which the standard integration should be activated
- Select the folder structure
- Complete the wizard and check the result
Dynamics 365 SharePoint integration enhances collaboration and document management, while effective Microsoft Teams governance ensures that your organization maintains control over its communication channels. By leveraging Microsoft AI solutions, businesses can automate processes and gain insights that drive efficiency. Additionally, robust Microsoft Teams channel management allows teams to organize discussions and resources effectively, fostering a more productive work environment. Together, these tools create a cohesive ecosystem that empowers teams to work smarter and achieve their goals.
- Secure the expert knowledge
- Benefit from checklists
- Use the decision matrix
Successfully connect SharePoint and Dynamics 365 in a seamless, value-added way.
Conclusion
Setting up Microsoft Dynamics 365 Document Management is not only quick but also transformative for your organization. By integrating Microsoft Office 365 Document Management capabilities, you can enhance collaboration and streamline your workflows effectively. With document management Dynamics 365, you gain the tools necessary to manage your documents efficiently, ensuring that your team can access and share information seamlessly. Embracing D365 Document Management will empower your business to operate more smoothly and stay ahead in today’s competitive landscape. Start your journey towards better document management today and unlock the full potential of your resources.
We recommend a system design and evaluation of the 5 most important key building blocks for Dynamics and SharePoint integration before you activate the Document Management feature of Dynamics 365.